top of page
TECHNICAL VFX ARTIST & DIGITAL ILLUSTRATOR
PROJECT:
WILDFIRE


CONTEXT:
Locked camera angles for either a non-interactive cinematic cutscene in-game or a log-in screen for a story centered third-person adventure game, similar to World of Warcraft's animated 3D log-in screens and cinematic shots.
MY WORK:
For my second portfolio piece, I wanted to make a cinematic environment with idling, ambient background visual effects. Taking inspiration from real-life footage of the California mountain fires and revisiting the game Evil West to study their background VFX, I decided on making a fiery, hot, and dry environment. The purpose of this project was to learn more about creating VFX in Houdini — studying how real fires behave in terms of temperature, smoke, and light emission, practicing cinematic shot composition, and pushing myself out of my comfort zone by learning how to light a nighttime environment that’s on fire. I also explored how multiple strong light sources interact simultaneously and how to balance them, while practicing VFX optimization.
HOW I PUT EVERYTHING TOGETHER:
MAKING OF THE FIRE SIMULATION:
First, I created a torus polygon in Houdini, which I then plugged into a mountain node, where I animated it by displacing its points across the mesh's normals via noise and fractals to achieve a periodic, chaotic, fast moving animation. I plugged this into a trail node to then calculate velocity and direction of the fire. This is then plugged into a pyro source to be converted into points which are then rasterized to create a 3D volume to drive the fire simulation via pyrosolver. I adjusted the look of the fire simulation itself in the pyrosolver by tweaking parameters like time scaling, ignition temperature, burn rate, emission of smoke, cooling rate, etc., to get the desired shape of the fire that I want.
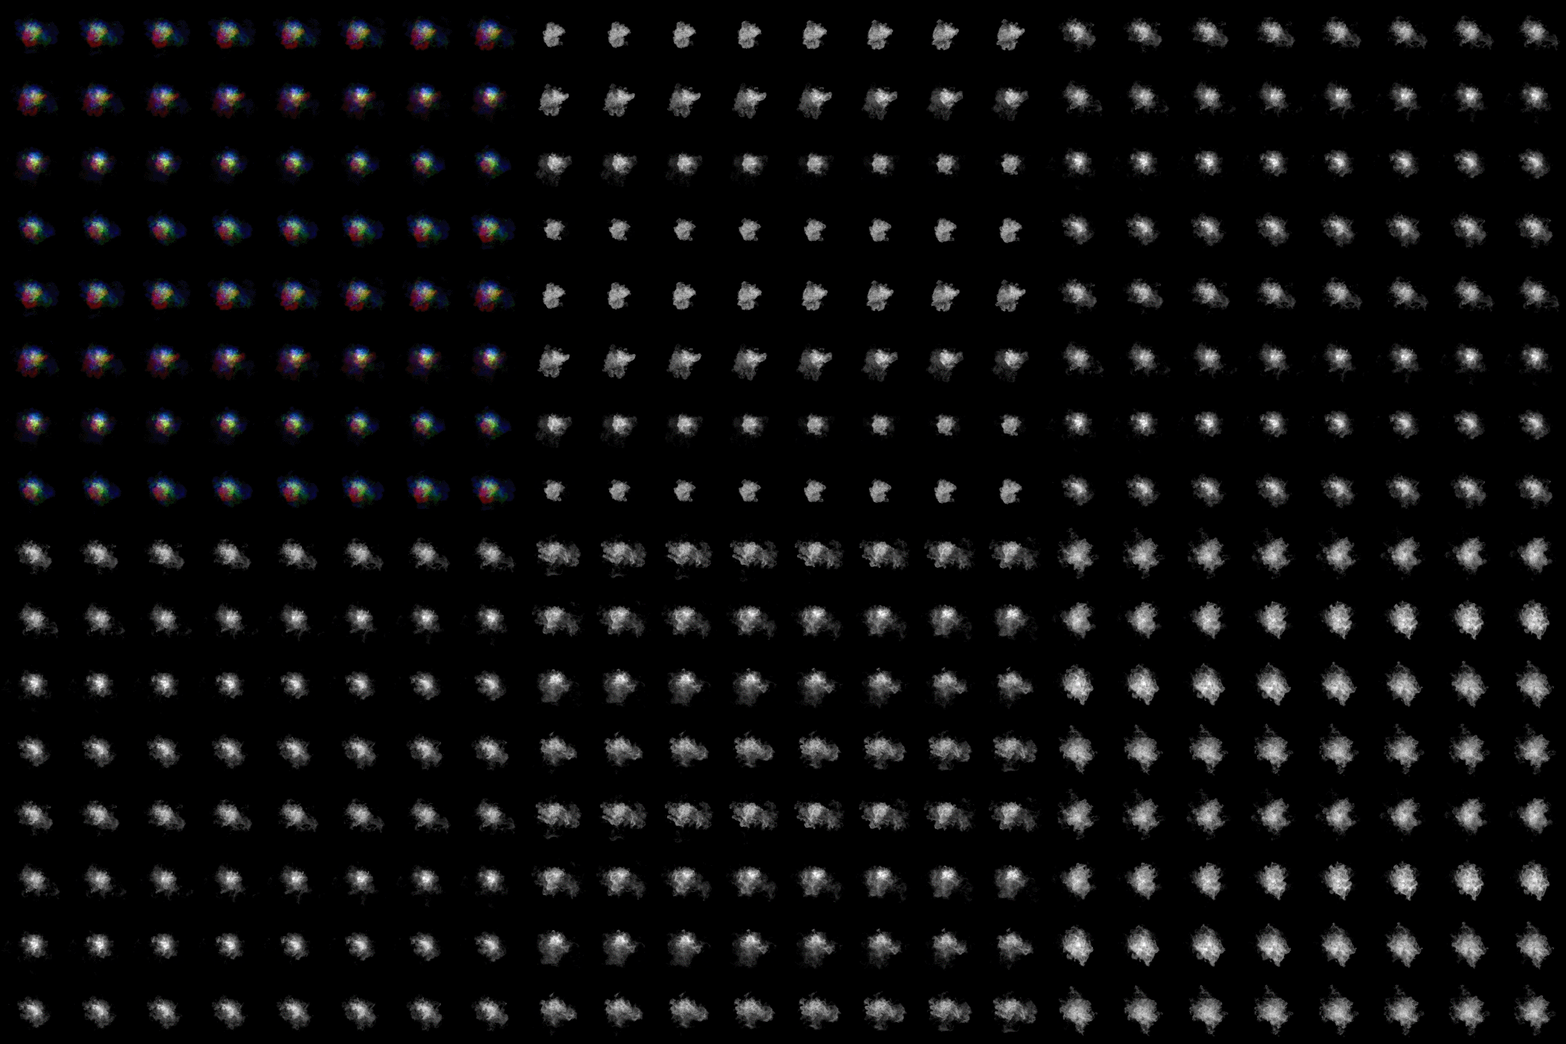
The pyro simulation is converted into a VDB, which is then plugged into the pyrobakevolume node for post-processing—refining flame details and performing greyscale color grading for later rendering with Mantra. Due to the high cost of volumetric simulations in real-time, I chose to cache the simulation over a timeline ranging from frame 0 to 150, allowing me to later select specific frames to render into a single flipbook texture.

Out of these frames, I picked a random starting point in the timeline and rendered out 64 frames that I wanted for the animated flipbook. While making these flipbooks, I encountered issues where they ended up not looping seamlessly when attempting to animate them in Unreal Engine, making them look very choppy in their transitions from the last frame back to the first frame again. This problem was solved by going back to Houdini and adding a Make Loop node to the cached simulation to automatically and quickly make it loop seamlessly.

MAKING SMOKE & MULTIPLE VARIATIONS OF SMOKE & FIRE SIMS:
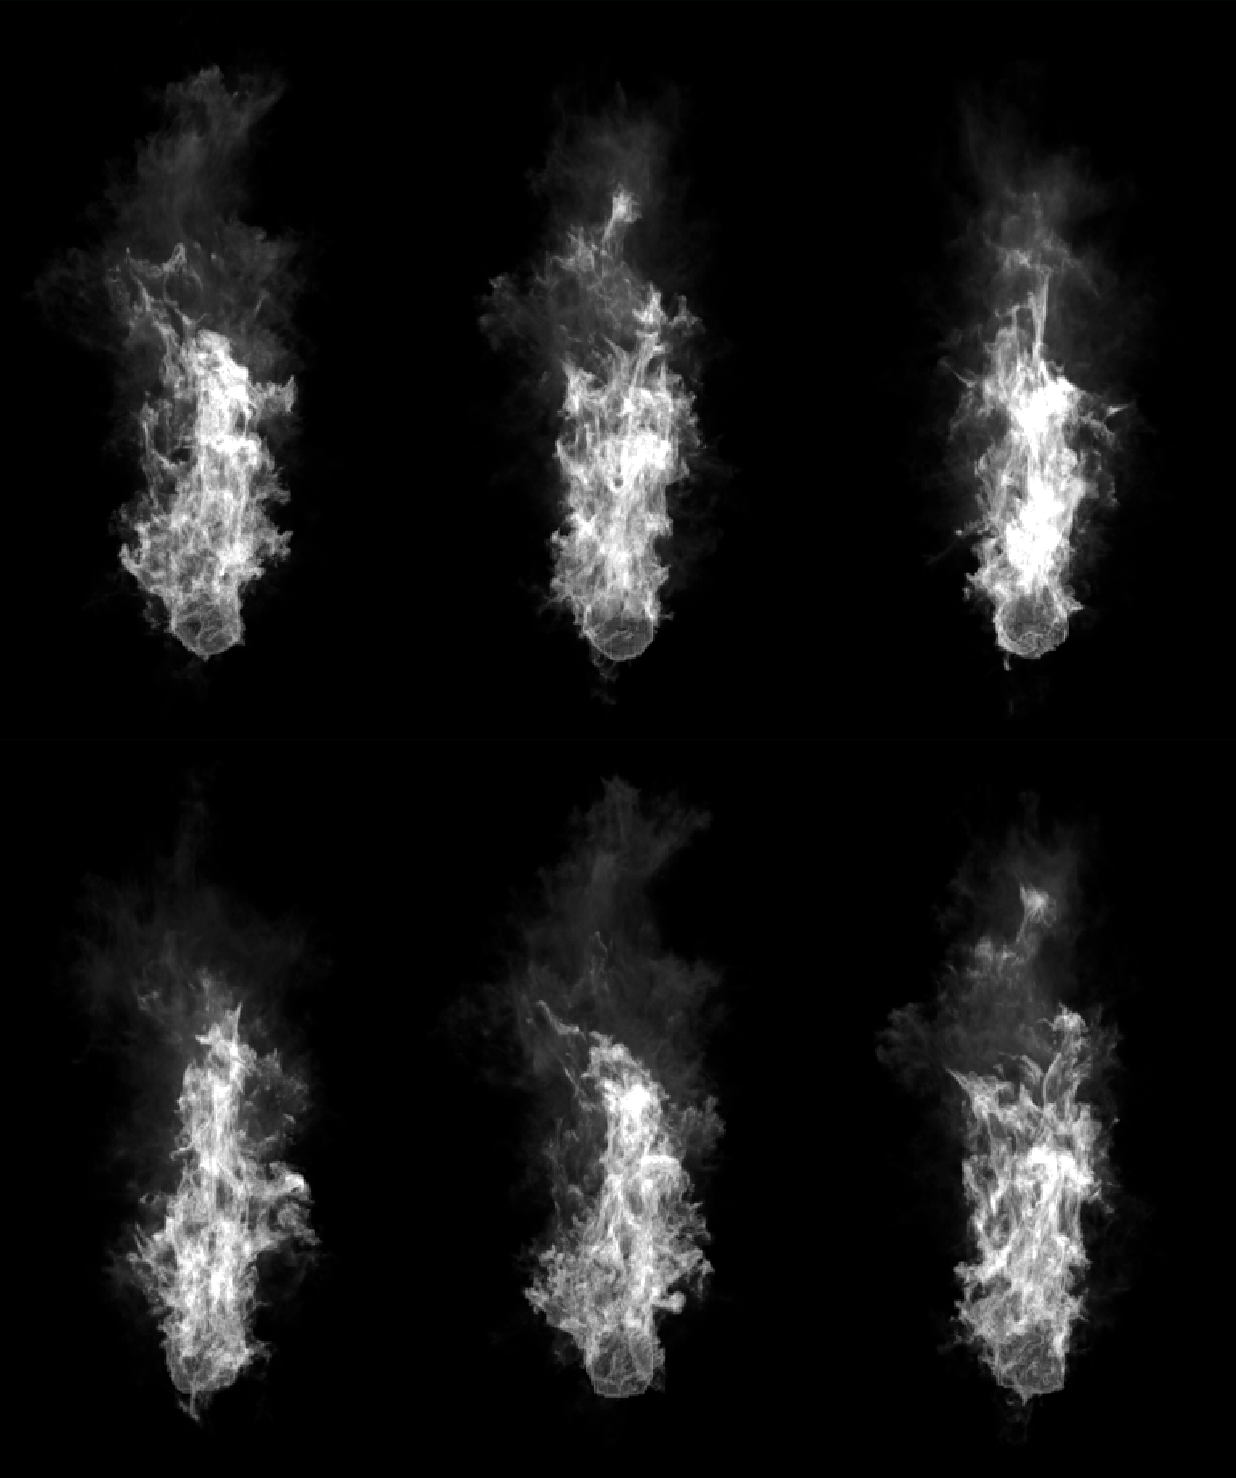
To save time, instead of creating new simulations from scratch for each fire and smoke iteration, I duplicated the initial fire simulation and slightly tweaked its parameters. This gave the flame a more wispy and smooth look to create a slight variation to the flame. I then cached 150 frames of this secondary version and created multiple variants of the fire just by dramatically manipulating the camera's angles in the scene. This allowed me to greatly manipulate the look of the fire to create the illusion of it being a completely different simulation despite having the same origin. I took this even further by rendering four of these from four different starting points and camera angles to make them all look like smoke clouds, when they're in fact just fire simulations in disguise. I applied the same technique to the original fire simulation by positioning four cameras to capture it from various viewpoints and different starting frames within the cached timeline.


THE FIRE & SMOKE MASTER MATERIAL SETUP:
Rather than creating separate materials and multiple textures for fire and smoke, I chose to combine the fire and smoke flipbooks into just two texture files and use a single, unified material. This material can be instanced to generate multiple fire and smoke variations by using a texture input and a channel-switching system I built into the shader. This setup allows me to combine different color channels to produce unique variants without additional shader compiles or increasing texture memory consumption.


CONFIGURATION FOR PHYSICALLY ACCURATE COLORING OF SMOKE & FIRE:
Rather than setting the colors of the fire in the texture file itself or coloring it via Particle Colors, I simulated colors of fire by creating a blackbody system for fire by multiplying the texture with a constant editable value. This works as our temperature, which is then plugged into the CurveAtlasRowParameter containing a color curve to map out a gradient to our greyscale texture. The brightness — in other words the intensity of the color — is then controlled by another adjustable constant parameter. The result of this is lerped with the same texture switcher again for the alpha, which is then also lerped with the emissive channel which is multiplied with a very faint tint color. This allows us to get a more physically accurate result compared to coloring it with a solid color overlaying the greyscale texture.


INSTANCING THE MASTER MATERIAL FOR SPECIFIC COMPONENTS FOR THE MAIN TREE
PART 1: FIRE
Rather than making a Niagara particle system with multiple active emitters in one system for fire, smoke, and sparks, I opted to instead split them into two components; the fire, and the smoke and embers. The fire is a shader applied to static plane meshes that play the animation at all times, facing the camera at every viewing angle except for the Z axis.
To set it up to play it as a flipbook animation, I simply used Unreal's own Flipbook node with time multiplied with a constant to drive the animation, while plugging in two more constants into the rows and columns input to control the atlas size of the texture's UVs.
To make it billboarded, I subtracted the object position with the camera's position and normalized the result, which is then fed into an append with an input value of 0; Cross-product it with a Vector 3, and then input all three into the corresponding X, Y, and Z inputs of the InverseTransformMatrix. This process transforms the result of the subtraction between Absolute World Position and Object Position. The transformed vector is then added with the Object Position, which is then subtracted with the Absolute World Position. This is then added with CameraOffset into the WorldPosition offset to control both the billboarding of meshes and the faking of depth by offsetting it away or closer to the camera.
As for blending the fire with the tree itself, I simply use a Depth Fade with the fade distance set to a high value to control the amount of blending between translucent objects with opaque.


Instead of individually placing out planes in the scene, I duplicated the static mesh component of the main tree itself and then replaced the tree mesh in the duplicated instance with a static plane with the fire material instance added to it. These in turn are then duplicated in the same instance and matched with transform location values to the sockets on the mesh that I individually placed out. That way we get one single mesh with a reduced amount of drawcalls to save on performance. The same method is used for the smaller log on fire in the foreground.

INSTANCING THE MASTER MATERIAL FOR SPECIFIC COMPONENTS FOR THE MAIN TREE
PART 2: SMOKE & EMBERS
The Niagara system for the smoke & embers — the second part of the component named above — is a pretty simple one, as it is just a single system with two emitters that spawn particles on the mesh's sockets that I placed out manually. I then add a Sphere Location module to the emitters to make the particles spawn in a bigger circle to prevent them from spawning in a cluster that is densely overlapping on top of each other. To randomize the smoke. I set it to spawn at a random frame in the flipbook animation timeline to give a more chaotic, non-uniform look to it. To save further on performance and to be able to spawn multiple particles at the same time, the system is set to be running on the GPU rather than the CPU in order to handle a large amount of particles rendering at the same time. I repeat this process for the embers coming off of the background logs and foreground logs.


For the floating embers, a simple Niagara system was created where the particles loop and get recycled in view.


LIGHT FUNCTIONS:
A simple light function made for the flickering flames using a panning voronoi fractal texture that I made in Substance Designer to animate the flickering.


SCORCHED WOOD & GROUND VIA VERTEX PAINTING:
To sell the effect of the tree and parts of the ground being ignited, I added functionality for vertex colors within the mesh's shaders to use in vertex painting the meshes to make parts of them scorched. This is done by taking the shader's texture normal map input, multiplied with Vertex Color, which is then Linear Interpolated with a HeightLerp that has a tri-planar mapped panning noise texture (re-used from the light-function). The result of this is then multiplied with UE's BlackBody node to get a physically accurate display of colors of heat temperature plugged into the emissive color slot of the shader output.


HEAT REFREACTION:
As a further bit of flourish, I created a second material for heat refraction to emphasize the environment being searing hot. These are also added to the flames in the environment to enhance the look of the fires. I repurposed the noise texture used from the light function and the vertex painted burnt wood material and converted it into a normal map within the shader instead of creating another texture map. This is then combined with a spheremask to mask out the edges of the static plane mesh it is applied to; it also has controls for adjusting the size of the mask itself.


WHAT COULD HAVE BEEN IMPROVED UPON AND IF I HAD MORE TIME:
PERFORMANCE:
• Reduce the number of particles being spawned simultaneously and decrease size of particles to prevent a lot of overdraw.
• Rework the heat refraction material to not use the refraction input, and instead rely on distorting UVs in a custom depth buffer as refraction gets really expensive when having a lot of it in the scene.
• Reduce the size of the spotlights for the tree flames due to said lights overlapping, which can cause issues.
WITH MORE TIME ON MY HANDS:
• I would have made the environment way bigger and made it interactive rather than opting for the static locked cameras. Populating the environment with more fire and smoke to create a more apocalyptic landscape.
• Adding fog cards that could interact with the fire by having the fire burst forth from a smoke cluster would have greatly added to the atmosphere.
• Work more on the lighting set-up and light-baking to further optimize performance.
• Create more unique and differing Houdini fire and smoke simulations.
ACKNOWLEDGEMENTS:
All textures and shaders have been created by me using Houdini and Unreal Engine 5. The environment was built using assets from Quixel MegaScans and from Andrew Svanberg Hamilton's Rural Australia Content pack.
Link to Andrew Svanberg Hamilton's portfolio:
https://www.artstation.com/andrewhamilton
bottom of page